Tuesday, November 22, 2011
D60:Pedal Mounting D5 + Steering Column Install D1
Below is the gas pedal mount from D4 tacked in with the gas pedal assembly installed. This also shows the outer bushing case that will hold the steering column.
With all three pedals in, the steering column mounting is underway along with figuring out steering linkage from the column to the rack. Here is a view of the pedal box with the steering column "installed".
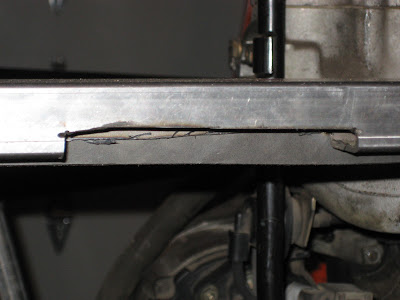
I needed to cut one last hole through the firewall to pass the steering column through. As you can see below... I should have measured twice. Instead I cut the hole in the wrong spot and resorted to using a pair of tin snips to ugly up the hole, but remove enough material to give the column enough clearance. When I pull everything out to paint the frame, I'll work on making that hole a little cleaner.
One of the next items on the list is to figure out the extra linkage needed to connect the steering column to the rack. The issue I'm running into is that BMW doesn't exactly use commonly available steering parts. Some investigation is definitely needed to get this designed and built out.
Last item completed today was getting the clutch line installed. One big advantage to using the factory parts is I can take the original clutch line and with a little bending get it in and installed. This took all of 10 minutes tops. Now I wish I hadn't broken the bleeder fitting off in the clutch slave cylinder the last time I got the engine installed in the frame. Now I have to get a new slave cylinder before the clutch can be crossed off the to do list.
Monday, November 21, 2011
D59:Pedal Mounting D4
The first thing on the to do list today was finishing off the frame mods to add the lower support for the pedal firewall. Below is the rest of the frame added for the bottom. It's also at about 15 degrees. The rest of the framing to add material for welding hasn't been added yet, but I ended up adding that extra sheet all the way around the frame.
With the firewall frame finished and the firewall tacked in, next up was getting the top mount for the pedal assembly mount. Below, a new cross bar with a mount can be seen in the top right.
With the clutch and brake pedal in, I needed to figure out the steering column positioning. It took some time to decide if I wanted to use the factory method/mount to pass the steering column through the firewall. This involves using the original gas pedal assembly which combines a plastic bushing to pass hold the front end of the steering column.
Using the factory brake booster and pedal assembly limits the options for the steering column a little as it would be pretty hard to pass the steering column between the pedals in the center of the pedal box. This leaves mounting the steering column at an angle... which until I starting working on this part of the car I didn't realize that my M3 is setup the same way. How could I drive a car for 5 years and not realize the steering wheel wasn't first, centered on the drivers seat, and second, wasn't pointing straight out of the dash. I decided to use the original gas pedal assembly. Below is the the original firewall mounted on 1/2" square tubing as supports. I'll fill in the empty parts before finally welding the mount into the frame. ...and the mount above with the factory gas pedal.
Using the factory brake booster and pedal assembly limits the options for the steering column a little as it would be pretty hard to pass the steering column between the pedals in the center of the pedal box. This leaves mounting the steering column at an angle... which until I starting working on this part of the car I didn't realize that my M3 is setup the same way. How could I drive a car for 5 years and not realize the steering wheel wasn't first, centered on the drivers seat, and second, wasn't pointing straight out of the dash. I decided to use the original gas pedal assembly. Below is the the original firewall mounted on 1/2" square tubing as supports. I'll fill in the empty parts before finally welding the mount into the frame. ...and the mount above with the factory gas pedal.
Sunday, November 20, 2011
D58:Pedal Mounting D3
With the pedal firewall mount assembled, it wass time to get it mounted in the frame. The first issue that I came across was that I cut the sheet too small and there wasn't any overlap on the frame. I'm realizing that one of the issues with using flux core wire and no shielding gas is welding any thin gauge sheet is almost impossible without burning through every quarter inch. Frustrating! To remedy this, I framed out the frame where the firewall sheet will be mounted. The beginning of this frame is shown below.
Next problem was that I needed to mount the brake booster higher than I thought to clear the frame. The additional height that I added when building the 15 degree angle on top of the pedal box was about 1/4" too low, of course. Easy fix, just cut out a notch to fit the pedal assembly mount.
Below is the firewall sheet mocked up to show the final assembly and make sure everything fits before making the rest of the frame changes.
Finally, the whole pedal assembly installed to show the brake booster in place along with the pedal mount and clutch master cylinder. There will need to be some additional changes to the frame to fill in the space on the bottom half of the firewall sheet along with adding some more support to the firewall.
Monday, November 14, 2011
D56-57:Pedal Mounting D1/2
I spent the last couple of days working on the pedal assembly and getting the factory pedals mounted in the frame. The first change needed was angling the mount about 15 degrees to replicate the factory mounting of the brake booster and master cylinder. In the first two pics are the modifications made to the frame to achieve this angle.
The next step was integrating the original mounting plates into the new firewall. Below is the firewall from the BMW that will be used instead of recreating it in new sheet metal. The original plan was to make the new firewall a single piece. After mocking everything up, it was obvious that another solution would be needed.
The new solution is a 2 piece solution. The top half of the firewall to mount the pedal assembly and then add the bottom half as a separate piece.
Below is the top half with original firewall wall piece and the new firewall separate...
...and then on top of each other which will be the final assembly. Reusing the original means I don't need to go out an buy all the necessary hole saws to replicate the original. I'm trying to keep this as low cost as possible.
Monday, November 7, 2011
D55:Driver's Seat
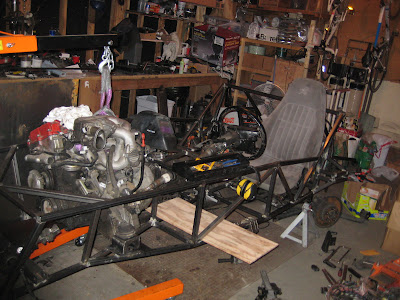
Before fitting the pedals and the steering wheel I wanted to make sure I knew how they would feel actually sitting in the car. So, the next obvious step was getting a seat into the car. The seat is out of a 90's Camaro. I had to shave a little foam off the sides, but it fits nicely. The slider works, as does the vertical adjustment.
On a side note, is it wrong to have a chevy seat in a bmw based build? Oh, and who'd have thought a seat from a Chevy would be attached with metric bolts? Below you can see the mounting hardware and seat base. An important note here, when mounting a seat on a slider, make sure both sliders are lined up BEFORE welding the mounts in place. Otherwise things tend not to line up correctly.
And of course, now that I can actually sit in this build, a big smile is in order.
Subscribe to:
Comments (Atom)


