Showing posts with label mounts. Show all posts

Thursday, February 23, 2012

D83-84: Upper A-Arm Mounts

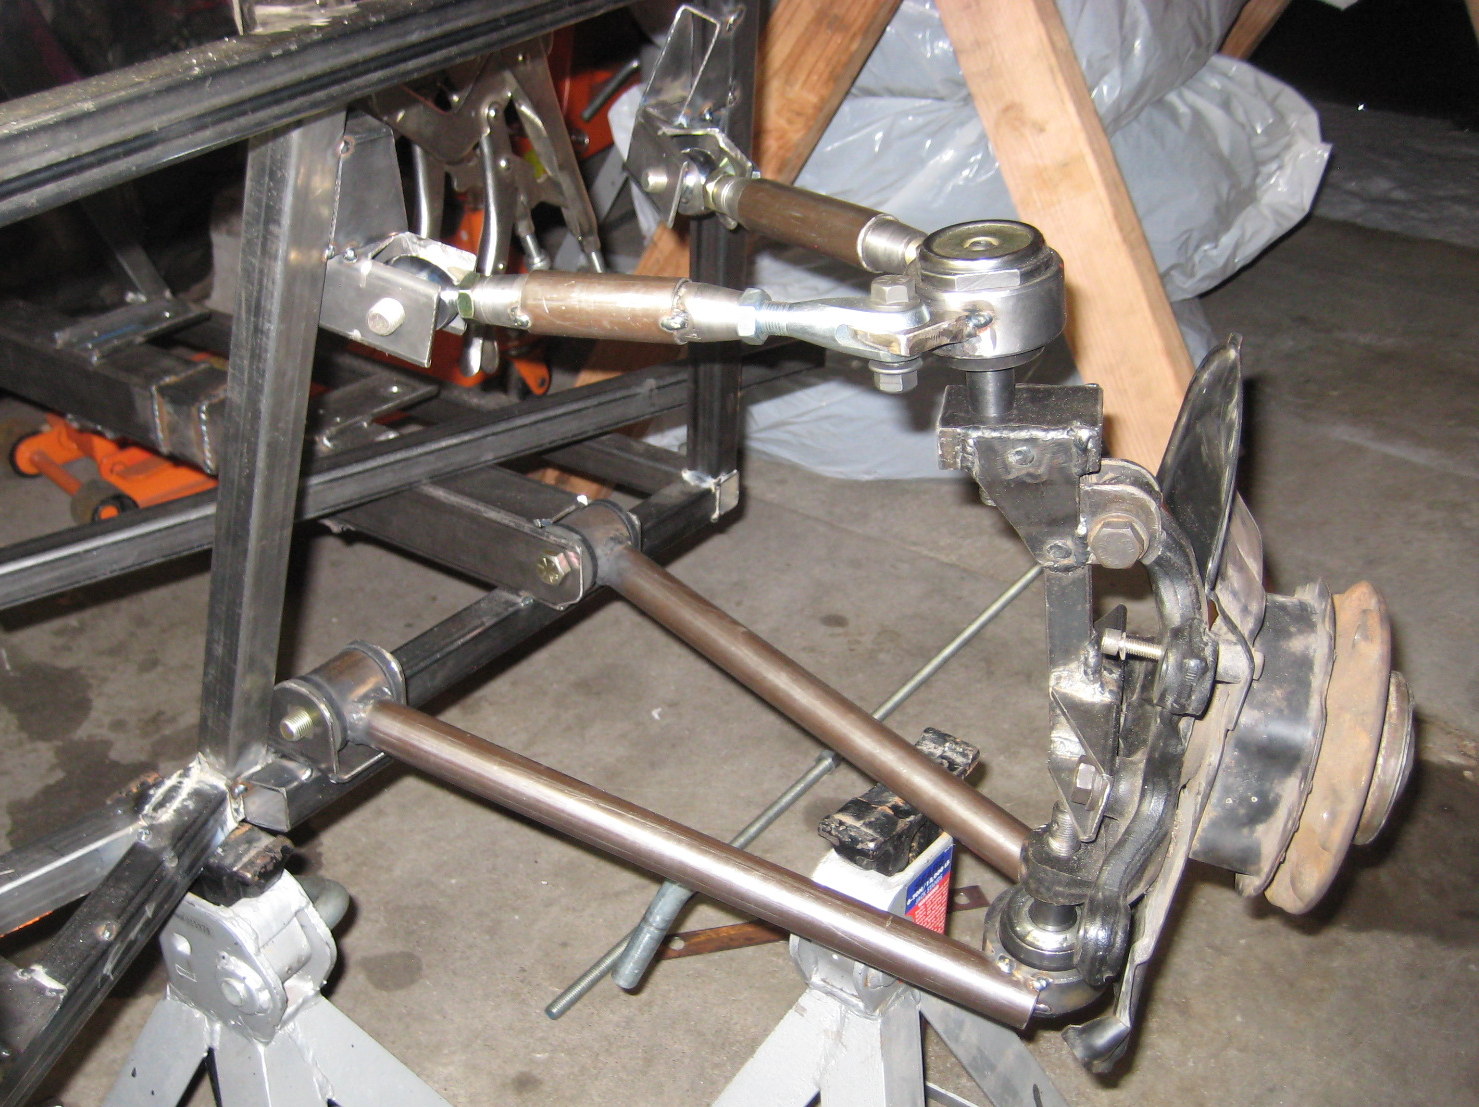
I got a little time tonight and a last weekend in the garage working on the upper a-arm mounts and here is (hopefully) the final product.

I replaced the rear vertical tube with 1 1/2" square tube. This should allow for a stronger support of the upper mount. I'm mounting the upper a-arm to a piece of 3/4" DOM (.120 wall) tubing. This mount allows me to use a 1/2" bolt.
The front mount is 3/4" DOM through a piece of 1"x2" tubing. I tried to align the mount so that the tubing was horizontal, but more importantly that the mount is 9" above the lower control arm. I'm still trying to figure out how to add sufficient support to this mount.
Here is the finished product with the upper a-arm "installed". One thing I like about this design is there is plenty of space to fit a coilover shock and spring.
The last part of the front suspension is modifying the driver side steering rod end. Then it is on to final welding the frame and building the cage.

Tuesday, January 31, 2012

D82: Front Suspension Rebuild #4 D2

I built new mounts for the upper a-arms. I've got the mounting bolts vertical now instead of horizontal. I wanted to try this out and see if it would work better than the old design.
With the new suspension design, I needed to move the steering arm from mounting on the bottom of the spindle to the top of the mount. This required a new steering arm. I've used 1/2" rod ends on the spindle side. On the steering rack side, I cut the threaded portion of the factory arm off and used it as an "M14x1.5" weld bung. Saved me having to buy a random metric tap.
A picture of the completed lower control arm and the upper a-arm along with the new steering arm all assembled with the tire.

Monday, January 30, 2012

D81: Steering Rack and Column Updates

With the newly redesigned front suspension I needed new mounts for the steering rack. Below is the design for the new mounts. From the previous post, I knew how high above the lower control arm pivot I wanted the center of the rack to be and from the original design I knew how far in front of the front cross bar I wanted the rack to be. Thus, the design below.
Below is one of the two mounts for the steering rack that will attach to the front cross member.
Both mounts tacked onto the front cross member and the steering rack in place.
The new design I have for the steering column required a few mods to the firewall. The first was installing a firewall mount for the steering column. I replaced part of the firewall with this 1"x2" piece of tubing.
With the firewall mount in place, I wanted to make sure the the column cleared the brake booster. From the pick below, there is plenty of space.
The new steering column connected to the steering rack. Getting rid of the extra piece of linkage makes for a clean install. I also think it'll be a safer/stronger design.
The last pic is the steering column next to the pedal assembly. The new column will come almost directly out at the driver instead of the previous design where the column was at an angle. Again, a cleaner design.

Sunday, January 15, 2012

D78: Steering Column + Radiator Mounts D2

Today I worked first on finishing up the steering column extension, and then the radiator mounts. I welded a 3" extension between the two pieces of the steering column I had a few weeks back. The hardest part of this was getting all three pieces aligned so that the steering shaft inside wouldn't bind. The extension is fully welded around both ends along with a couple of plug welds.
Column outer sleeve to add 3" to column.

The next step here is going to be finalizing the placement of the steering column and wheel and getting the last bit of mounting in place to hold it all together. Also, since I moved the steering rack back while getting the front suspension figured out, I also need to modify the linkage between the rack and the column. I'm going to wait to finish this until I have the engine back in, just to make sure there is plenty of clearance.
Steering column mocked up.

Next up today was the radiator mounts which I started yesterday. The BMW radiator has two rubber plugs along the sides which sit in cups in the frame. The top is held in via removable arms that fit into a couple of slots. Below are a couple of pictures of the radiator in place. I love that the radiator doesn't hang out in front of the frame allowing me to build a nose that is "shorter". Also, I can install it upright meaning I get the best performance out of the radiator over installing it at an angle.
Radiator front.
Radiator side.

Below is one of the "cups" that I've added which the bottom rubber plugs will sit in. Obviously there is a lot of finishing work to be done here before I can consider these done. But functionally, they work, which I'm pretty pleased about.
Radiator mount close-up.

Tuesday, January 10, 2012

D73: Lower A-Arm Redesign #4 + Steering Rack Mount Rebuild

Yesterday I had another realization... the new a-arm design allows the wheels to turn fully outward, but now the wheel hits the steering arm when turned in. After Bash Head for most of the evening I sat down and redesigned the lower a-arms for a 4th time.

Below is the latest and hopefully greatest design for the lower a-arm. I've done a few things with the design this time.
  • I went back to the right triangle shape. This more closely emulates the donor setup.
  • I've also kept the width the same as the last set to keep the full range of wheel motion when the wheel is pointed out.
  • I've measured the distance that the ball joint is moving forward to plan for enough clearance for the steering rod when the wheel is pointed in.
With these changes and the change to the steering rack mount, I've moved the steering rack 4 1/2 inches closer to the ball joint. This should give me full range of steering motion in both directions.
Lower A-Arm Design #4.

As I just mentioned, I also made a change to the steering rack mount. I cut out a section so that the steering rack could slide back closer to the mount. This moved the rack 1 inch closer to the mount helping achieve the 4 1/2 inch difference mentioned above.
Recessed notch for steering rack.

Steering rack installed in mount.

I plan on installing the modified mount about 3 1/2 inches further back to keep the wheelbase the same as it was with the previous a-arms. This also means no rework on the upper a-arms. It'll move the rear lower a-arm mount behind the upright similar to the first (or second) design.
Steering rack mount in the frame.

Saturday, January 7, 2012

D72: Upper A-Arm Mounts

If you noticed, I missed day 71. I finished the second lower a-arm a couple of days ago and didn't blog about it since it looks almost identical to the first one in D70.

With one upper a-arm finished, I was ready to get the mounts in to make sure everything would come together. I also needed to figure out how long each tube + weld bungs is going to be.

Last night I spent a little time with CAD figuring out the layout of the mounts. I went in knowing the following:
  • The mounts would attach to the two uprights
  • The mounts would be made out of 1/8" thick 1 1/2" square tubing
  • The angles of each of these mounts is 17 deg and 30 deg
I didn't want the rod ends to operate at an extreme angle, so I figured out a rough estimate for the angle of the front and rear.

CAD design of mount layouts. (They are wider than 9in.)

Next up was some CAD to figure out how far apart the lower and upper mount should be. I can't remember where I read this, but I remember 1" of travel should change the camber by 1 degree. The design has the distance between the lower ball joint pivot point and the ground along with the intended ride height of 6" (close to the donor) and then measurements from the frame.

CAD design of front suspension.

Upper a-arm mounts.

This design creates an optical illusion. Every time I look at it, I can't believe that the mounts are parallel. I keep seeing funky angles or thinking one mount is crooked.
[Top] Finished mounts + upper a-arm installed.

[Side] Finished upper/lower arms + mounts.
Note: The new location of the rear lower a-arm mount required a small addition to the frame. The mount only covered about a 1/4" in of the frame tube. It needed a little more reinforcement. I'm planning on more support later.

Sunday, September 25, 2011

D46:Front Suspension


I'm still working on my front end... not sure I'll ever settle on a final design. I've made a few changes that you can see in the pics. First, the crossbar that will be the mount for the front lower a-arm and the steering rack has been upgraded to 1/8" from 16ga. I felt like that part is going to see a pretty large amount of stress, and I watched "Senna" around the same time. I don't feel like having a catastrophic steering failure. Not that I really think something like would happen... mostly it's because the bushings I'm planning on using for the a-arms will be 1 3/4" wide and a 2" square 1/8" wall tube has... 1 3/4" width inside. Perfect.

I'm also working on the upper a-arm mounts as well. I'm attempting to build a McSorely-esque design except a little more homemade. I'm not 100% settled on something yet. I keep thinking it might just be easier to make the upper mounts fixed and forget all the complexity with making them adjustable.

Last bit of progress for the day was cutting the new front a-arm mount down tubes. If I choose the route of adjustable upper a-arms, I'll need both mounting tubes to be vertical. These will also work to support for the steering rack crossbar.

Wednesday, September 14, 2011

D45:Control Arm Mounts


The a-arm and control arm mounts are almost finished. I used a a piece of 2" x 4" 1/8" tubing, cut to width, then drilled, then cut in half. The stages are pretty clear in the second pic. I plan on adding one more hole in the bottom to weld in the final spot in addition to the sides.

Friday, September 9, 2011

D44:Steering Rack Mount Supports


Take 2 of the steering rack mount supports/control arm mounting point supports. I think these will do a better job than the first iteration.

Tuesday, August 30, 2011

D43:Steering Rack Mount D2 and Front End Mods


The front cross member is almost complete. In the second pic, the ends of the tube have been cut and drilled to mount the control arm (planning on 1/2" bushings). The lower steering rack mounts have also been welded on. My one concern with this is the main tube is only 16 gauge and I'd like something a little more substantial to hold the control arms, so I'm playing with some different ideas of how to strengthen the mounting points. My first trial is the third pic. The idea is to weld supports on both sides of the each end.

While fitting the front cross member I realized I wasn't very happy with how everything was "fitting" in the front end, so I decided to a little more deconstruction and reconstruction. I cut off part of the front and then moved the forward most a-arm vertical tubes and angled them back from the lower front to the upper support that I added a few months back. I'm realizing this doesn't make much sense so just take a look at the last couple of pics and compare them to the last engine fitting post pics to see the changes in the front end.

Friday, August 26, 2011

D42:Steering Rack Mount and Lower A-Arm Mount


I'm eager to get this project to the "roller" stage, so I'm going to start working on control arm mounts and steering rack mounts. If you remember from a few months ago, I was going to use the donor front cross member but then decided against it. Here is the new solution to that.

Using a piece of square 2" tubing, I'm going to mount the steering rack to the front and then use the ends as the front lower control arm mounts (more to come on this). The second pic is the progress so far with the top steering rack mounts fixed. A couple of design comments about this approach. First, the control arm mounts will be at the exact same width and position (looking from the front) as the pivot points on the steering rack. This allows me to mount the upper a-arms anywhere without having to worry about steering rack width and positioning which can lead to bump steer and number of other issues. I'll try to post a diagram to represent this at some point. Second, it allows me to use the donor rack without any mods to the rack or the front uprights.

In case you were curious what the original front sub frame looked like in comparison to the new one, it's in the second pic.

Thursday, August 25, 2011

D41: PT2 - Engine Fit 5


With the transmission mount built, I wanted to make sure it actually worked. So I found myself lugging the frame out of the garage and mounting the engine in it one more time. It's amazing how much more the frame weighs now than it did the first time around. One of these days I'll get a weight on the frame.

This is also the first time mounting the engine since fixing the engine mounts to the frame, so it was a good test for the positioning of those as well. You can see the final setup in the second pic.

With little else to check with the engine mounted I decided to play around with the shifter a bit. I've been a little worried that it wouldn't reach far enough back or would be too low or too high or some other issue that I hadn't yet thought of. To my surprise, it works great. The red piece is the shifter mount from the donor that I'm going to work into the new body panels. This way all the mounts, holes, etc are already there and all I have to do is weld it in.

Print