A couple more days working on the gas tank and it's finally to a "finished" state.
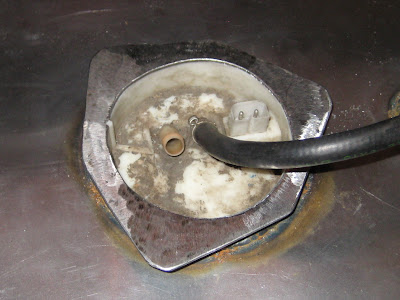
The first pic is the top upside down with the pumps installed. The left is just a pickup to pump fuel into the can where the right side pump actually pushes fuel to the engine.
Here is my "catch can" which the pump will pull from. The plastic one is the original one from the BMW.
Below is the can installed. Two plug welds hold it in place.
To attach the top, I first tacked it on all the way around. I also added "wings" inside the tank to plug weld the center of the top to the baffle in the tank. I figured this would help minimize warping.
... and the fully welded finished product with pumps installed. I welded the top about six inches at a time and then let the tank cool before continuing. It took a while to finish it off and the top did warp, but not too badly. Everything still fits without issue. At this point I put some water in the tank to make sure there were no major leaks in the top. A couple of extra welds, and it seems water tight.
I plan on using POR-15 tank sealer on the inside and POR-15 on the outside. That should fill any tiny holes that would cause slow leaks.
This last pic is of the plate that will hold each pump in tank. I plan on attaching this to the tank with three bolts.
Oh, and the one thing I forgot to add... a drain plug. I'm going to try to add one to make emptying easier as well as sealing the inside.
Monday, August 13, 2012
Tuesday, August 7, 2012
D102-104: Gas Tank D2-4
This past weekend I had a few good days in the garage... ending in one bad afternoon. I got the bottom of the tank welded and cleaned up. Took several fills to get all the pin holes filled. But, not it holds a little over 13 gallons without dripping. I also added a center baffle to help minimize sloshing.
With the bottom almost done, I started working on the top. I started by cutting the holes for the two pumps. Then made the metal rings that will hold the pumps. I didn't have a great template for a 4-3/4" hole + a jig saw to cut the holes... you can probably see where this is going. I had to "patch" around the ring off one because the hole wasn't round. Figured I could weld it and clean it up with a grinder later.
Then the bad afternoon. I started welding the rings and the patches on the bottom (inside) first. Then realized... a lot of heat + 18 gauge sheet equals the pic below.
This afternoon, I started the top over. Starting with a compass to stencil out the holes and make them a little rounder. I also added the holes for the fill spout and the vent hose. My plan this time for welding is two big changes. First, attach the top to the tank first to keep it from warping too badly. Second, take the welding slow and allow everything to cool between passes.
Subscribe to:
Comments (Atom)


